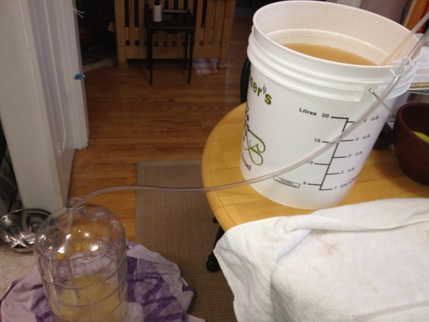
I’ve done several in my one bedroom apartment- with moderate success (the wines are definitely drinkable, but all wind up a little sweeter than I’d like.) I am going to chronicle the process of my next kit to share with y’all as I go along.
I’m working with a Vintner’s Reserve Pinot Blanc juice kit. The kit generally comes with juice, yeast, fining agents, and any other additions you need to make (like SO2 or oak.) The juice is already supposedly balanced for sugar, acid, nutrients, etc. As a general rule, I’d recommend you start with a white kit- just till you get the hang of things. There’re fewer steps to take, and you don't have to worry about color quite so much. The kits vary in price from a basic one like I listed above to some special edition ones. This is the first time I've gone this bare-bones, so we'll see how it turns out.
I plan to stray a little from the kit's instructions this time around, but if you’re a first timer and new to the winemaking process, I’d say just follow them to a T. If you are patient and can follow a recipe, you'll be dandy. The last two kits I’ve made have turned out decently well, but a little sweeter tasting than I’d like (despite finishing the fermentation) so this time I plan to do some tinkering around with acid additions. The other route I could take would be to try a different yeast strain, but this time, my goal is to play with acid.
One of my classmates, Dave Specter, of the soon-to-open Bells Up Winery in Newberg Oregon, (we’ll call him Dave the Awesome, or DtA for short,) was super generous and hooked me up with a list of supplies for my first home winemaking kit (and even mailed me a few extra useful things later on.) His suggestions were extremely helpful in getting me started. I’ve included them (as well as a few extras from my own experience) here. The notes are mine, but the list itself was mainly compiled by Dave. If you have any questions, feel free to contact me. If you want to praise Dave's awesomeness, do so in the comments.
I do recommend you get everything on DtA’s list before getting started. (I recommend you stock up on cleaning and sanitizing ingredients in larger quantities than you think you’ll need. Sanitation is everything. The majority of time you spend on this project will be cleaning and sanitizing. It is tedious, but 100% worth it. If you’re gonna be lazy about cleanliness, don’t bother making wine at all. It’ll be a complete waste of time and money if you get to the end and find out you’ve got vinegar or something that tastes like a packing box that sat in a flooded garage for a week. And yes, that's a thing.)
In terms of purchasing, I of course, recommend your local brewing or winemaking supply store first. However, if you don’t have one, then you can order online quite easily. Midwest Supplies has it all (and thanks to Facebook, I now know that one of my high school classmates works for them- small world!) Your first shopping trip for supplies won’t be cheap. But once you’ve stocked up, the only things you really have to get for each subsequent wine batch are juice kits, corks, bottles (unless you wash and re-use!) and cleaning and sanitizing stuff. Not too shabby.
OK- Go forth, collect your supplies and watch for the next post to get you started!
Did you know?
Winemaking can actually be dangerous! When working in the cellar, safety demands that a buddy system be used. There have been (very rare) cases of workers passing out and falling into tanks of wine because they got hit by a big rush of carbon dioxide at the top! Yipes! Especially while cleaning, some workers will even wear a harness- just in case. For you fellow TV nerds, there was even an episode of USA's Royal Pains in which this dilemma was featured. As I recall, the patient was saved- crisis averted!

 RSS Feed